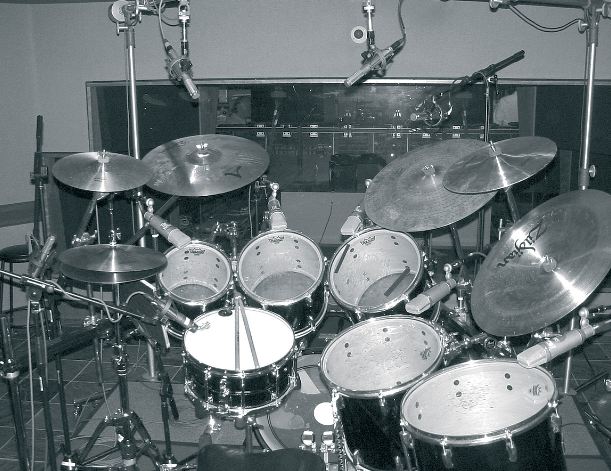
 As an audio engineer, recording drums can be both the best and worst part of a recording session. If you get a great drum sound the entire album can sound amazing – if you get a bad one… everyone might as well just give up and go home. Recording drums isn’t easy, but it’s also not very hard if you take your time, think about what you’re trying to accomplish, and always focus on the sound, not just how the drum kit looks when it’s got 18 mics on it. In this article we cover how to record the core of a drum kit: kick, snare and hi hat, and then use the rest of the drum kit, toms, ride, crashes, etc. to bring the whole thing to life.
Recording Drums: Preparation
Drums are a huge instrument, and they are never the same with each session. One week you’ll have a Jazz kit with a kick, snare, hat, ride, and two toms; and the next week you’ll had a Prog Rock kit with two kick drums, two hats, 1 and a half snares, 7 toms, and about 75 pounds-worth of cymbals (not including the gong or various chime looking things). For this reason, any good recoding engineer will take the time to do two things before even touching a microphone: listen to the demo of the song, and talk with the drummer about style and substance. If you don’t understand the song before putting a mic on a kick or snare, then you aren’t worth whatever money they’re paying you.
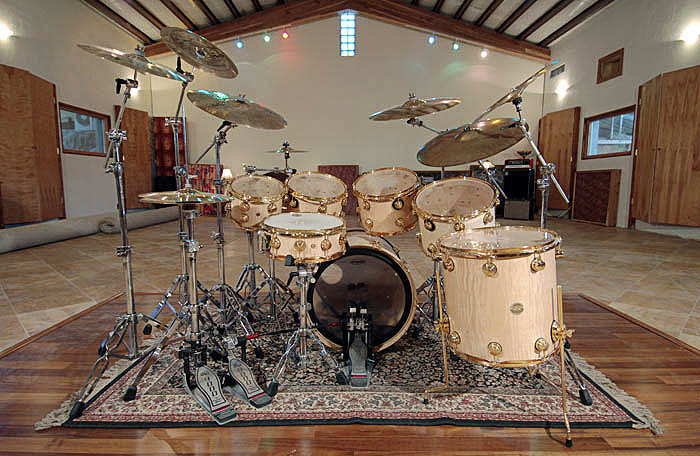
Pick your space
Once you know what the music is about and how the drummer plays, pick your space in the room. You don’t always necessarily put the kit in the same place, nor always on a riser or rug: it all depends on the sound you want. There was an entire Led Zeppelin album that was recorded outside on the grass in the back yard of Mick Jagger’s house (ok, “estate”). The point is: the floor, the walls and direction all shape how the big picture of your drums will sound, so think about it. This also includes deciding what sort of baffles and gobos you want to use. Put up some hardwood to brighten it up, or thick and stuff traps to absorb as much as possible? Once you start recording you don’t want to make a lot of changes, so pick your space wisely.
Lock two words in your head: transients and resonance
To help you start mic’ing the drum kit, think about the two dominant aspects of a drum: the stick and the tone; the transient (attack) and the sustain (the resonance). Kick to Crash, they all have those two basic aspects. Which microphones you select, and where you place them around each part of the drum kit change the balance and characteristic of those two things – which means you MUST know what you want to get out of the attack and resonance of the instrument before you actually start trying to capture it on tape. A 2-year old can point a mic at a snare drum; you want to do intelligently. Being smart in the studio saves time (money) and gets a better sound. It doesn’t have to be perfect at first placement, but earn your pay and have at least an idea of what you’re doing first. If you don’t know: keep reading, as I’ll talk about some starting points in this article.
Resonance of a drum is vital. If a drum is dead: stop drop and send the drummer to the local music shop to buy new drum heads. If they have no tone in the real world, then it will be very, very hard to bring them to life after you’ve recorded them. Not all things can be fixed in the mix.
Recording Drums: The Core: Kick, Snare, and Hat
Most listeners are focusing 95% of their attention on the kick drum, snare, and hi hat (that includes the band). You have to get those to sound good or nothing else matters. Have a plan, audition mics, and above all else, understand what the heck is going on with each of the three parts of the kit.
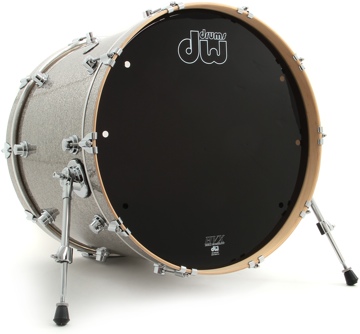
The Kick Drum
To understand how to record a kick drum, you need to understand what high pressure levels can do to microphones. To understand that, you just need someone to stand very close to you and shout in your ear.
When you stick a microphone inside a kick drum (especially if you have not taken the second head off opposite the beater), then that mic is getting pummeled with a very high sound pressure. High sounds pressure (for our purposes here) 1) creates more low end, and 2) distorts and muddies the sound because the mic cannot handled it. I’ve lost track of how many times I’ve taken the outside head off a kick drum while getting sounds, and then the drummer tells me that it’s the first time they’ve had a recording engineer do that and it sounds so much better on tape that way. You don’t need to do it all the time… but when recording you need some control over the sound output, not merely raw power. Shoving a mic into the small hole doesn’t do it and trying to dampen it doesn’t usually do the trick; it’s still too intense inside the kick to sound really good when recorded. You want quality sound, and taking off the outside head lets you get close to the beater and the skin without having as much super-pressure from a mostly-enclosed kick drum.
You also don’t have to get fancy. Suspending mics on bungee cords inside a kick won’t get you any better a sound than anything else. FOcus on your job: get a good sound. If that means the set up looks like a junk yard to achieve it, so be it: only the sound matters.
Make the kick drum sound tight by adding mass
 If the kick is messy, muddy and/or sloppy: take off the second head to decrease the pressure inside it, and then add a lot of MASS to it. Do NOT just stuff the thing with blankets or pillows. That will deaden it, but not tighten it. Soft material will deaden the head and a little bit of the wood (less resonance), which sometimes you want, but that also makes it sound flat – that you don’t want. You want tight, not flat and without a good tone. “Tight” keeps the tone of the instrument while getting control over the boominess and boxiness of the thing. Music is tone and rhythm… you don’t want to kill half of what defines music by making deadening your drums too much.
Mass (dense, heavy weight) helps absorb some of low frequency energy that causes distortion and makes it muddy. For kick drums, do NOT use sand bags inside it, those will just make the kick sound flat. You want things like chunks of lead, or sealed paint cans full of water (we used to do that a lot to help tune them). I had a giant, old power transformer I used a lot because it was small, but very heavy. Put something soft inside so the drum doesn’t get scratched, then add some mass. It will help make the sound tight without losing the tone like soft material does. Throw a big ‘old dynamic mic inside and you’re should have a big, yet clean low end for your kick drum (however simple it is, I always like the Sen. 602 inside a kick: start slightly off access, about 3-4 inches away from the head and half-way between the center and ring).
Natural sounding kick drum
The easiest think to remember about natural sounds is that sound travels in air. The more you remove air, the less natural they sound. So the more you spot mic and EQ out high frequencies (where what we call “air” in a sound lives), the less real and more like a synthetic sample it will sound. Everyone wants their kick drum to have balls and be big, but most of them always forget that to not sound like a piece of junk it has to also have tone and air in order for the transient and resonance to sound good and not just like a giant thump with a ticking attack sound at the top. The skin of the drum for a millisecond or two actually makes the same sound as rubbing your palms together. It’s there, but it just happens really fast, but it’s that exact sound that makes drums (not just the kick) have a more natural sound. So don’t forget about the air. You will need 8kHz – 12kHz in there to get the skin sound.
EQ and microphone placement
You also need to know what happens to your sound when the mic in different places in and around the drum head. Here are some basics that are generally true for all drums (or things that are round, really, as some are also true for amplifier cabinets).
- Proximity: the closer your mic gets to the skin the more low end it will have. However, this also can make the sound muddy, so you have to be careful not to rely on proximity to boost the low frequencies too much.
- Axis: if the mic is pointed directly at the skin (90 degree angle) it’s going to get more high frequencies. Not necessarily the attack sounds (1k-3.5k), but more up top from 5k-10k. As you move the mic at an angle so it’s not pointed directly at it, these frequencies decrease. This is very, very subtle when you’re dealing with sounds as loud as drums, but it’s basic mic theory that you can use.
- Putting the mic at the center of the drum head will give you more stick and less resonance, then as you move it more towards the outer ring, you get less stick and more resonance.
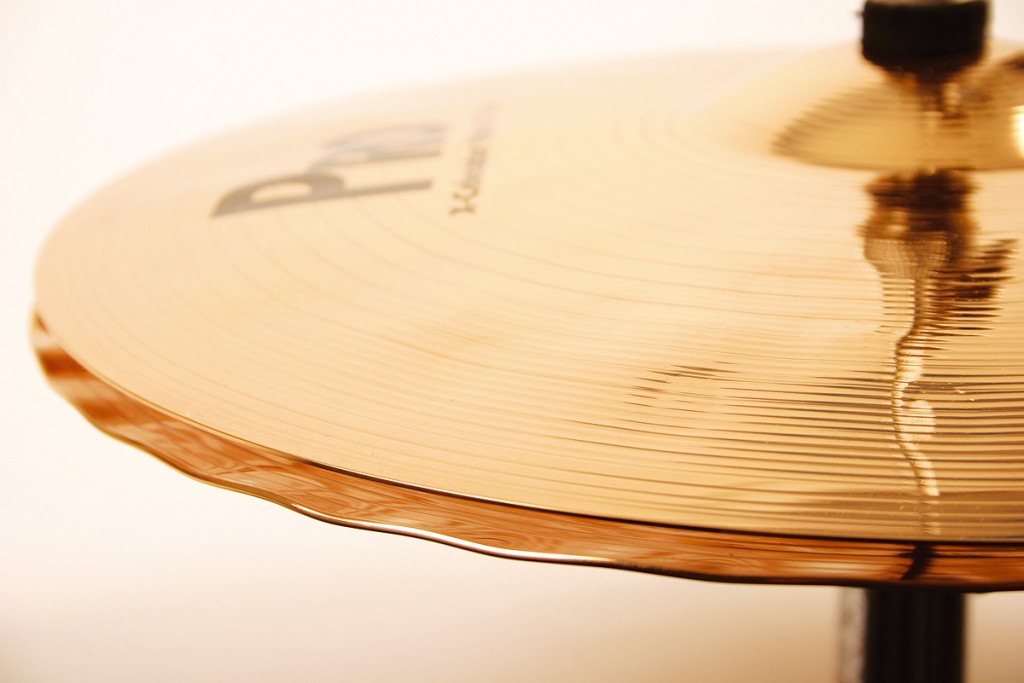
- Note that the above also applies to cymbals, but people tend to use different terms even though the same thing is happening: the center of a cymbal will be crisp (often too harsh), and as you more towards the edge it gets softer, more “sizzle”.
Depending on the style of music, you’ll also want a second mic. I always prefer options when mixing, so by default always put two mics on the kick drum (inside dynamic and outside condenser). I don’t necessarily use both in the mix, but at least the option is there. There’s another post about that here: using two mics on a kick drum.
I don’t think engineers should walk into a session always thinking they know exactly how to EQ anything; you should never get stuck in your ways. If you have good ears and train yourself, then you’ll hear what you need to do rather than depend on what a book tells you. That being said, there is another post about EQ’ing a kick drum that you can use to get started. Never forget, though: frequencies written down on a page are just a guide, not a rule. How it sounds is the rule.
Recording The Snare Drum
The snare drum moves a song a lot more than most people think. Initially, you think it’s the kick, but the ear focusses much more on the frequencies that are created by the snare drum, which is why it’s really important to get right.
Make sure it’s a good sounding drum
 I cannot overstate the importance of starting the day with a good snare drum, a new drum head, and a box full of new drum sticks. Everyone knows that guitars need new strings, but they too often overlook that drums need new heads.
I worked with a guy who often used sheep skin heads on his snare. The tone was insane, and it recorded like magic, but they only lasted a couple takes, so they were not inexpensive sessions. I’m not saying you have to spend $500 on heads every day to get a good sound, but I do need you to understand how much a difference it makes. The band will thank you in the end for giving them good advice.
Mic on the top of the snare
Once you get a good snare that’s tuned and read to go, start with the top mic. This is where you’ll get all the tone and most of the stick. You should also enter the day NOT assuming you’ll put a mic on the bottom.
Take a dynamic or two and maybe a couple small diaphragm condenser mics (put on the pad, please), then remember the notes from earlier in this article about the tone vs. attack as you move closer and further away from the edge of the drum: the edge gives more tone, the center less. Start about an inch from the edge with the microphone at about a 45 degree angle. With the top snare you have the issue of leaving the drummer enough room to work, so you have to be careful. Sometimes (rare, but sometimes), I’d use two on the top: one small clip mic like a Sen. 604 or something like Shure 98ADC right at the edge to get as much tone as possible, then the old SM57 standby angled and further in to capture the rest of the drum head. You have to be careful w/ the blend. Even though both mics on on the top, you can still get phase issues, so listen carefully when mixing. Also: don’t use two mics if you don’t have to. The purpose is to capture two different aspects of the snare: tone/resonance, and the hit / attack. If both mics sound the same, get one out of the way of the drummer and look using a bottom mic to get the rest of the sound you need.
When recording, be gentle with any compression and EQ’s; you want to leave yourself room to mix. Train your ears to listen for everything: all the frequencies and nuances. The goal is to make sure all those “pieces” exist in the signal you’re recording, so that you can use them as needed when mixing. You can find more specifics about snare compression and EQing here: snare EQ and compression tips. If you still get stuck with a bad snare sound, you can find some tips here: fixing a bad snare sound.
Putting a mic on the bottom of a snare
Always ask: why am I putting this mic here? In this case, the bottom of the snare drum is going to catch 90% the actual snare sounds. Sometimes it even sounds like plastic. This mic by itself normally sounds pretty bad, but with some good EQ’ing and subtle blending (and flipping the phase) it can help bring some “schhssshhhsccs” to the snare sound. For bottom mics, a small diaphragm condenser mic running through the oldest tube pre-amp you have in the studio can help make it sound a bit less harsh. Don’t compress it at all while recording, and do everything you can to isolate it from the noise that happens in that area (kick and hat hardware and pedals tend to bleed into it).
Recording The Hi Hat
I love a good hi hat (I mean, who doesn’t?). From Jazz to funk or R&B, a well-played and good-sounding hi hat can add layers of sonic coolness to a track… but if it sounds like crap, then all it is is a sore thumb you can’t mask in the mix. The dominant frequencies of a hi hat are exactly in the range where the human ear is the most sensitive. Couple that with the intensity of hitting stick to metal and one can see how such a thing can be either a feature or a hindrance to the song. Basically, the sound better not suck or it’s the main thing the listener will notice (subconsciously or otherwise) for the entire duration of the song. If you think hard enough I’m sure you’ll remember songs that might have a great melody, a decent overall sound, but there’s “just something about the damn hi hat” that steals your focus when listening to the song.
Know what you’re in for
 If doing a full record, I try to get a demo of every song or go to a rehearsal where I can hear them all. One part of that is to note what the hi hat is doing in each song, because I tend to decide on two different placements depending on if it’s predominantly open or closed during the track. Open hi hats can sound like crap if you have it mic’d for it being mostly closed. Moreover, most drummers play like they do when they play live: loud and out of control, but when they do that to open hats, they don’t put enough pressure on the pedal to keep it somewhat under control, which leaves the thing crashing and clanging all over the place. (Ideally, they should never just leave it open with no pressure: they want to keep it “sort of” closed rather than totally open. It still has an open, crashing sound, but that little extra pressure gets rid of the ‘CLANG!!!” and odd boominess that happens between 300-500Hz that’s created from the bell of the hi hat if it’s let loose more like a gong.) Never forget: you’re the boss of the sound, and any good producer will give the engineer a lot of leeway to give suggestions and make changes if at the end of the say it makes the sound better (because that makes the producer look better). It’s totally acceptable to tell the drummer to add some pressure if their open hat is out of control. If they don’t believe you: have them crash away with it open, then with some foot pressure, and bring them into the control room to hear the difference.
Find the sizzle of the hi hat
Drum kits always have plenty of clang and crash, so you want to start by finding the softer and more gentle sizzle from hats, crashes, splashes. Once again, remembering the numbered list from the beginning of this article: you get generally softer towards the outside edge of “round things”, which includes hi hats. The sizzle, then, is on the outside edge, and the clang is closer towards the bell.
The angle of the mic is very important. (We’re assuming starting with a small condenser mic, because they pick up what you need, but are small enough to get steep angles and stay out of the drummer’s way.) Start with it about 3 inches away and at a very steep angle (not pointed directly at the hat at all), and angled so it’s pointing away from the rest of the kit in an effort to reduce bleed as much as you can (but there’s going to be a lot no matter what you do, so don’t worry much about it).
When adjusting, change the angle first, then how close it is. If it’s too boomy, almost distorted sounding, you need to make sure the pad is on and then move it further away (up, not out). Have the drummer hit all different types of hits: open, closed, foot stomps, etc. to ensure you’re getting everything you need.
It’s usually OK to put an aggressive high pass filter when recording it around 300-400Hz. Oddly, there are times when you might need frequencies around 500Hz, so don’t get rid of those entirely.
When you’re happy with the overall sound, try some extreme EQ’ing (not to tape) just to make sure: cut out a lot in the mid range (to make less harsh), and boost a lot in the very highs (10kHz +) to make sure you have plenty is sizzle in the signal.
Bring The Rest Together: Toms, Cymbals, Overheads, Rooms
Once the core of the drum kit is handled and have your focus, you can work on the rest. A lot of the songs will use the rest of the drum kit as just fillers instruments, but double check to make sure it’s not some sort of “4 minutes of the floor tom” sort of song first. In many ways the rest of the drum kit gives context and added texture to the core. They’re all important, but they are the frame around the core of the kit, so they need to be approached in a way that compliments them, just merely sounds good when solo’d
Recording & Miking Tom Drums
Don’t think over think the Tom: it’s purpose is pretty simple and the key is to make sure you have plenty of tone and that they are tuned well. Make the drummer spend time tuning the toms so they sound as good as possible in the room and relative to one another. 20 minutes tuning will save hours of headaches.
Keep one word in mind when getting sounds on tom drums: clean. If you get a nice clean sound, then you’ll be in good shape. Most of the time a single mic, close to the edge, at a 30-60 degree angle towards the center will do the trick. If you feel compelled to try a mic on the inside of the drum, keep pressure levels in mind, and the same concepts you do when putting a mic inside the kick drum.
Toms can often be more distracting in a song than they should be. People often go for a huge sound that is great when it’s solo’d, but when it’s put into the mix all it does is muddy up the track like there’s no tomorrow: confuses it with the kick and even bass guitar, and since there’s so much sustain on toms, the extended duration of its sound can even make the song sound out of tune. You MUST be able to control the power and sustain of each when setting them up to record. If you do not: imagine how muddy your mix will be if they have 4 toms, all hit with in a roll, and each one sustains for 3-4 seconds… that creates just wall of “booooom” which does nothing but bad to a mix.
There are a lot of different approaches that give you a starting point for getting your tom sound. You can find a couple of those here: EQing a tom drum. (Always remember: any suggestions someone gives you are just a starting point, in the end you gotta get it to fit with the song.)
Overhead mics
First of all, symmetry is overrated. You’re not trying to win an award for visual balance in architecture in placing overhead microphones – you’re looking for balance in sound.
Before you start standing on chairs, if you can, make sure to put a spot mic on the ride if you have the room. Of all the times I’ve been disappointed when mixing it’s because I can’t get what I walk out of the ride.
You want that to be crisp and more present than most. Start about 3 inches from the edge, 4 inches up and work from there. It’s never a bad idea to have your ride covered just in case.
Overhead mics are not just about capturing all the crashes, splashes and grunts from the drummer. They also ad a bit of depth and texture to the drums. If you want a fake, super tight drum sound, then get yourself some triggers or a fake drum kit. If you want a real sounding drum kit, then use the overheads to fill it out, give it some space and character.
Stereo image is important, but your not looking for what it would sound like if a person just stuck their head in the middle of the drum kit. You want to get a balance in the mix, which means sometimes the mic placement is NOT equal off the center of the kick drum.
Insofar as the infamous “microphone over the drummer’s head” technique. Sure, whatever. Try it if you want, but that didn’t start for recording reasons. It started for live reasons because they didn’t want to have a mic stand directly in front of the drummer blocking the view of the audience. That’s not to say, however, that an third mic in the center can’t make it sound better, but just give up on the whole “what the drummer hears” justification that people always seem to use because they don’t know any better and think it sounds cool. A center overhead can help focus your rack toms and provide some center balance between the ride and the hi hat, so it’s OK, but not a magic wand or anything. Give it a try and use your own judgement.
Room mics for drums
 When it comes to recording drums, room mics are just about my favorite things. I’d sign a song about room mics if I had a decent singing voice. Of course, you need to have a good room. Recording the sound in a room won’t do much good if it sounds like crap. If the studio is too boxy, then you’ll have to work hard w/ the EQ and some multi-band compression to get it to sound decent, but if it sounds good, some high quality room mics can make the drums sound huge and lifelike in a recording.
One hopes that if you’ve taken a few moments to have the drummer play the entire kit and walk around the room to hear how it sounds in different areas. Room mics do NOT always have to be symmetrically in front of the kit. Yes, you have to worry more about phase issues if you’re randomly placing them, if it sounds best in a particular spot in the room, you better damn well put a mic there and think about phase issues later.
Don’t restrict yourself to ear level. Stand on a chair, lay down on the floor, listen to the whole space. I worked in a room where I often put a room mic literally on the floor because the reflections were a lot brighter there. Face the mics backwards, too, and see what happens. We’re talking about room mics, not spot mics, so they do not need to be formal and well-behaved by making eye contact: they only need to sound good.
Start by breaking the drum recording rules
Do I think a lot of people go overboard when recording drums? Sure, but we all do at one point or another. One sad truth about audio is you have to work and spend 100% more to achieve a 5% increase in quality… and most people who listen won’t be able to tell the difference, anyway.
So break some rules.
Try some new ideas… BUT… when breaking recording rules, always follow at least one: Every Mic Must Have A Purpose. Don’t just throw mics at a drum kit to see what happens. My dog can do that (no, really, he’s trained). Think, then place the microphone. I don’t care if you put a mic on the moon… so long as you have purpose for what sound that mic is supposed to capture… then more power to you, and rock on.