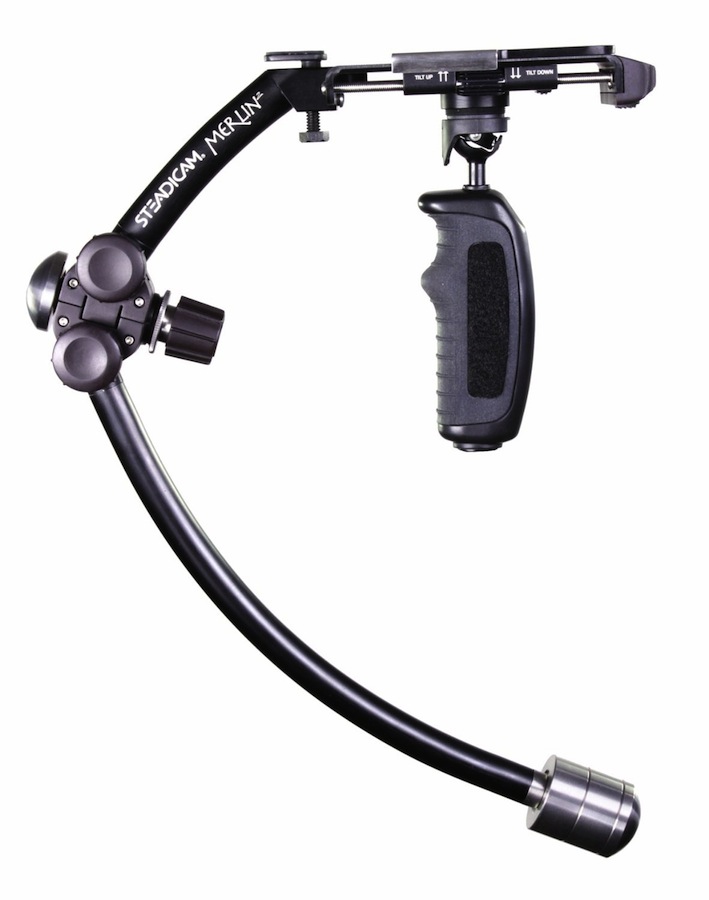
How I learned to balance a Merlin 2:
Background story: Recently, I had to work on a handful of video shoots where we needed to use a Steadicam Merlin 2, arm, and vest. I’m an editor, so like all Steadicam newbies I went online. I looked at the merlin cookbook, watched the videos and the DVD… mostly I found comments like, “It’s really hard to balance a Merlin 2”, and “it’s super sensitive”. For better or for worse, these film projects I got myself into required that I use different camera set ups and change them while on location: a Canon DSLR 70D (with two different lenses), and Canon XF100 (with either a mounted shotgun mic, or a Sennheiser receiver for a wireless lav) – lots of changes that required re-balancing the Merlin2.
Basically, I had to learn how to balance the Merlin while on set; re-balancing the stabilizer for each camera set up while everyone was waiting around and watching impatiently… No pressure. The result was that I had to come up with some ways to quickly balance it with different cameras so we could keep shooting. The truth is: balancing is not that bad – if you take the time understand how it works before you start running around your local park looking to create filmmaking magic. The Merlin 2 is deferred gratification. It’s a tool, and you have to learn how it works before putting it to use. Quick balancing isn’t always perfect (static balance is fast, dynamic balance takes more time), but it’s usually good enough to get the shots you need. Here’s what I do for quick balancing on the fly:
How to quickly balance a Steadicam Merlin 2: Drop Time First, Fine Tuning Second.
1. Before you start balancing a steadicam you must accept a truth: just because your Merlin 2 is balanced doesn’t mean you’ll be perfect operating it. You’ve probably already seen forums that say, “practice, practice, practice”… they aren’t kidding. It’s a skill that requires muscle memory and a feel for movement. You can’t cheat a Steadicam. A lot of people think that the Steadicam’s balance is still the problem, when in reality, they’re just not very good Steadicam operators (yet).
2. Is the lens cap off? (Yes that makes a massive difference in balancing.)
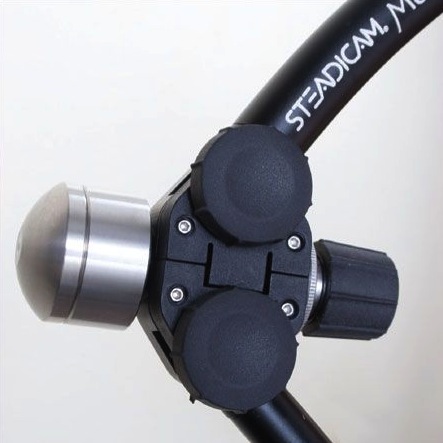
3. Now begin balancing the Merlin starting with the recommended settings. Start with the weight(s), arc size, and stage positions from Tiffen the cookbook. To you don’t have them yet, I put all the settings into one PDF file here: Merlin Cookbook Balance Settings, and you get look for new additions on the Merlin Steadicam site. You can assume the weight count and rough positions are correct, which saves a lot of time. If your exact camera set up isn’t there, find one with similar shape and weight: you don’t have to be exact in the beginning. I’ve balanced the same camera set up with different weights and arc settings. Both balance settings worked, they just behaved differently, particularly on whip pans and quick stops. Moreover, no matter how much time you spend trying to get the dovetail plate exactly on the right number on the stage… it won’t be exactly the same every time you try – so stop wasting time on it. Put it on, lock it in, and use the trim to fine tune the tilt.
4. Maintain a rough up/down balance while starting to adjust. If it’s massively off (i.e. it flops forward or backward really quickly), change the dovetail plate position on the stage until it’s mostly under control. It doesn’t need to be perfect, so don’t bother getting finicky about it. The point is to keep the camera stable enough so you can check the drop time while you adjust the arc size. Get close and move on to the next step. Time is money.
5. Do you need to adjust the Merlin 2 arc size at all? To answer that you need to know what arc size on the Merlin does: it changes the leverage of the weight below the gimbal. It balances the weight “around” the gimbal. Primarily, this determines your drop time. Bigger arc = more bottom heavy. Smaller arc = less bottom heavy. Remembering step 4 “keeping a rough balance”, check your drop time. If it’s too fast or too slow, you need to adjust the arc a little.
5b. Quickly adjusting the arc: When adjusting the arc on the Merlin 2 remember: Bigger arc = more bottom heavy (faster drop time), and camera lens tilts up. Smaller arc = less bottom heavy (slower drop time), and camera lens tilts down. To help you visualize the arc to tilt relationship, think of a circle around the gimbal: Making the arc bigger moves the bottom weights away from you, and the entire rig rotates in that same direction around the gimbal, which means the camera tilts up. Making the arc smaller moves the bottom weights towards you, and the whole stabilizer moves in the the same direction, so the camera tilts down.
If your Merlin is bottom heavy, give 2 turns counter-clockwise on the caliper knob to make the arc smaller. Then 3-4 turns to the trim setting on the left-hand side of the stage to move the camera backward on the stage (so the lens tilts up)
If your Merlin is top heavy, give 2 turns clockwise to the caliper knob to make the arc bigger. Then 3-4 turns to the trim setting on the left-hand side of the stage to move the camera forward on the stage (so lens tilts down).
All you care about right now is drop time, so check it. Generally, target about 1 second (it doesn’t have to be exact). If the change in the tilt setting wasn’t enough to compensate for the change in arc size: adjust the up/down tilt again so that it’s close enough to check the drop time. You don’t need perfection on tilt right now, so don’t hyper-focus and waste time. The easiest way to quickly do this is to allow the bottom weights of the Merlin 2 to lightly rest on a surface (ground, floor, a knee, table, whatever) so that it’s still. Then lift it slightly and watch where it goes. Put back down so it’s resting, adjust, and check again. (It’s also a lot easier to turn the caliper knob to change the arc size if it’s lightly resting on a surface that way.)
If the drop time close to 1 second, lock it in with the locking screws on the arc. However, if it’s top heavy (the camera falls over), or it drops too quickly, then you need to keep working on the arc size to get a better balance between top and bottom weight before moving on. Remember: if you change the arc size without also compensating for the resulting tilt at the same time, then you’ll drive yourself crazy. Every change in arc size should immediately be followed by an up/down tilt change to compensate before you let it loose to check the balance.
5c. Measuring the arc size: When the arc size is OK, and if this is the first time with this camera set up, grab some old wire and cut it the length from screw to screw on the ends of the arc (there are recessed hex screws on one side of either end). You can throw those cut wires into the respective camera cases, and using those is a lot easier than a ruler or tape measure to set the initial arc size. Every time you put the camera on you will have to fine tune with the trim and z-turn anyway, so a simple wire or string to get the arc size with a couple millimeters or so is plenty accurate.
6. Assuming your tilt is not terribly off, now you want to fine tune the drop time of the Merlin 2. Most tips on balancing the Merlin 2 don’t give the drop time enough importance. For me, the drop time is the most important, because it determines how the entire Steadicam rig behaves while using it. If your left / right is really bad, then go ahead and use the trim screw on the back of the stage to adjust until it’s manageable. Remember: it doesn’t have to be perfect yet – you’re setting the weight balance for drop time first. Don’t let imperfections of tilt at this point bother you at all. It’s not worth the stress.
7. Different Drop Time Settings for Merlin 2. They say you want about 1 full second of drop time. Personally, I like a little longer (if indoors or no wind). For me, a more neutral balance makes it easier to lock the shot after panning, and 100% easier to keep still if I need to hold a vertical tilt. Now that your arc is set, the drop time process is all about the Z-turn setting — that screw setting under the stage that moves it closer or further away from the gimbal. Drop time recommendations from my perspective: 1 second (or even less) if outdoors with some wind, 1.5-2 seconds if indoors or if no wind. Even with a camera on the heavier end of what the Merlin can handle, it’s still not very heavy, so outdoor shots with wind will bounce it around a lot. Also note: as conditions change, you’ll need to adjust your drop time to be optimal. There is no universal setting for all environments, again illustrating the fact that you should practice balancing a Steadicam set up just as much as shooting with it.
 8. Z-Turn settings: If you have a higher number of turns (you see more threads, counter-clockwise) it makes the Merlin 2 more top heavy, which will increase your drop time. If you have a lower number (less threads, clockwise), the Merlin 2 becomes more bottom heavy and your drop time will increase. This setting is all about leverage around the gimbal: picture the hinge on a seesaw moving in different directions on the board, and how much more or less force would be required thereafter to move it (the hinge is the gimbal in this case). Adjust it one turn at a time until you’re happy with the drop time.
9. If you still can’t get the drop time you want: you need to adjust the arc again (back to 5b). If the drop time is too fast, that means it’s bottom heavy, so you need to make the arc smaller (or possibly take off a weight). As mentioned earlier, when you make the arc smaller it will cause the camera to point down, which means you also need to move the camera back a little on the stage to compensate. Now reverse that if the rig is top heavy: arc should be made bigger, and camera needs to move forward on stage to compensate. Understanding that small relationship between arc size and where the camera is on the stage will make your life a lot easier when balancing the Merlin 2 on the fly. This process is not an easy thing to read about, either: you have do it. Get it close to balanced, then change the arc size one way or the other so you can practice how to move the camera on the stage to get the up / down balance back again. You’ll get a feel for it pretty quickly.
9b. Importance of Leverage: the further away the stage is from the gimbal the more leverage it has, therefore the smaller the adjustments required on the trim to change the overall balance. If you find that the trim is too sensitive (i.e. the smallest of change to the trim throws it off balance too much), then your Z-turns are probably too high. That means you need to do the following:
- Decrease the bottom weight a little by making the arc slightly smaller;
- Move the camera on the stage slightly backwards using the up/down trim to compensate for the arc change, and;
- Decrease the number of Z-turns until you get your desired drop time back again.
10. When you get the right drop time on your Merlin, NOW you’re ready to fine tune with the trims for tilt. The most important thing to remember: the trims will have a slight impact on one another. This is where a lot of people get really frustrated. Even if your camera is mounted on the dovetail plate so the CG is perfectly over the gimbal, a front tilt will also slightly change your left / right because the weight distribution of the camera isn’t perfectly uniform. You just have to work both the trims until you’re there. It doesn’t have to be absolutely perfect every time. I don’t know about you, but most my shots aren’t 60 seconds non-stop and perfectly level. I need to move or pan the shots, so if the Steadicam balance isn’t “perfectly level all the time” it doesn’t matter by the time we edit. Adjust according to your need for the shot. Trying to get it absolutely perfect every time just annoys those around you and wastes time. Being able to accept that truth will save your sanity: every shoot has a certain tolerance when it comes to “perfect balance”.
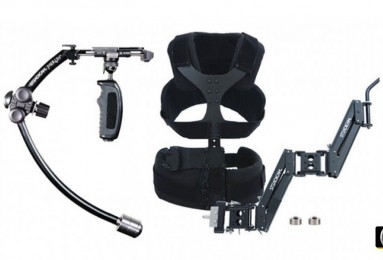
Adjusting the Steadicam Arm and Vest for Merlin 2
1. I’m left-handed, but for this sort of stuff I’m still usually right-dominant. However, I ended up being more comfortable having the arm connected to the left side of the vest (default, I think, is usually right). Try it w/ the arm on the other side, pick the one you like best. The only “right way to use a Steadicam arm” is the way that works best for you.
2. Most online forums and tips say to adjust the tension of the arms so that they are both level when holding the full weight of the rig. I can’t tell you why, but I’ve found that my walking is dampened more if there’s more tension than that, so at least give it a try. Increase it so the arm is pushing the camera up, not all the way, but significantly. For some reason, if my arm is forced to push down slightly on the arm as I’m walking, rather than having to hold it slightly up which is what you have to do if the arm is set to horizontal, then it makes for a smoother walk. Again: adjust the tension you need according to the shot. You don’t set it once and never touch it again.
3. Don’t wear Converse shoes. Their soles are too flat on the edges and add shock to your walk. (No kidding, changing my shoes made my walking a lot better. Indoors if you don’t have to deal with OSHA: shoeless.)
4. Now that you’re wearing the thing: have some fun for awhile, but focus on locking the shot after a walk or pan (not just walking smoothly). Stopping motion and starting motion are the hardest parts. Everything in the middle is the easy in comparison. The only way I ever get a lock after swooping around is if I put about 50% less pressure on the guide than the smallest amount of pressure I thought was possible. (I’m not kidding, especially if you have a drop time around 2 seconds.) Too much pressure and the camera moves the opposite direction. Too little and it keeps rotating. It’s surprisingly difficult, but not impossible. The only way to get it right is to practice it a couple thousand times so your fingers remember instinctively exactly how much pressure is required.
5. If you have a dogs: follow them around the back yard. Dogs are great to practice tracking unexpected moves and getting better at framing shots on the fly (and they’re not self-conscious like people) ;)