 If you’re in a professional recording studio, working out of your bedroom, or have a home studio that’s somewhere in between, a lot of recording tips are universal. It’s true that having the best audio gear can help you get a “better” sound, but most of the time simply thinking about the recording process and making good decisions while in session can be the factors that make a great sounding recording.
These 20 or so recording tips (in no particular order) cover studio set-up as well as things you can do in a recording session to help you know how to get high quality sound. But first thing’s first: there is no magic “make it sound good button.” Get over the idea and get serious. If you want to be a good audio engineer, then you need to know your gear and know a lot about sound. If all you want is to get a vocal that doesn’t sound amateur then this post isn’t for you.
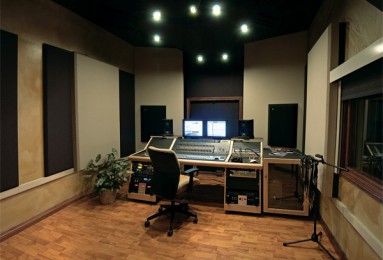
Know your space. If you’re in a spare room in your house, or are recording in a totally new space take a minute or two to look and listen to the the space, both where the musicians will be and where you will be monitoring the session. I once did a location recording gig in an old funeral home… that was interesting… made sense that it’s natural reverb was, well, creepy. Getting to know all the rooms and stairwells helped ultimately get a pretty unique recording. You want to look at the spaces because visually you might quickly notice how the shape or materials will cause acoustic problems, and then you want to listen to make sure you’re right. If the location where you are sitting and listening for hours on end is basically lying to you because of bad acoustics, then your entire perspective gets thrown off. You can’t always fix these problems, but you must at least be aware of them. Often times simply going back and forth between your monitors and a good pair of headphones can help keep your perspective allowing you to be confident in what you’re recording. If you’re ears are off, so is everything else. (More on: recording studio acoustics tips)
Know your microphone polar patterns. This is for two reasons: isolation, and creative mic’ing when you’re in a bind. When you’re not in a big live room that’s sounds really good, chances are you’ll want to isolate your sounds while recording, rather than use the sound of the room. As such, you need to know microphone basics (polar patterns and pads), and how they can help you focus or broaden what will be picked up by the microphone. The latter purpose, creative mic’ing, is because you might not have 20 mics to work with at any given point, so by taking some time to study and test different microphone techniques, you will be able to use your knowledge an apply it to being creative.
Love your cables. We used to spend dozens of hours just teaching interns how to properly coil a cable. But more than that, make sure that when you are setting up your space that you’re using good cables and connectors. Keep them clean, make sure all the contact points are tight. It’s a little thing that helps ensure your signal will be clean.
Get rid of system noise before anything else. Every space has noise. Whether than be the room itself or a particularly difficult ground hum or buz, you need to know what noise lives in your room and system. The more you can eliminate, the more room you have in the dynamic range. Get a couple good power conditioners, pay attention to all your grounding, make sure you have good tight switches, and patch points, etc. etc. The noise floor is your starting point and will haunt you when you start to process signals if your system isn’t clean.
Don’t waste time trying to create perfectly dead acoustic spaces (Particularly for lead vocal tracks.) The world has ambiance – it’s the way it is. That means that when you solo tracks you will always hear some of the room in which the vocal was recorded. Usually, the best you can do is mitigate it so that it doesn’t come through in the mix in a way that is distracting. You don’t want to hear the boxiness of your broom closet where you record the vocals, but you will never get the vocal perfectly dry in 99% of the spaces in which you have to record, so don’t freak out about it. You would be amazed at how much of the room or vocal booth you can hear in professional recordings when the lead is solo’d, but when it’s in the mix we can’t tell that it’s there. What you want to focus on is ensuring that whatever room sound that is picked up does NOT do one thing: make the signal muddy or boomy. Control that, and you’ll be OK. I promise. Focus on the performance and the tone of the instrument / vocal. If the sound of the instrument is amazing, you’re in great shape.
Get a good patch bay and know how to use it. Patch bays are great tools to expand your processing and tracking options in a studio. They are the guts of large consoles that allow engineers to access signals are various different points in the entire signal path – and move them around if needed. Patch bays allow you to access your aux sends, inserts, direct outputs, tape sends and returns, and all your outboard gear in one place without having to duck underneath your desk and cross patch your gear whenever you need to change the signal path. More on how to wire a patch bay.
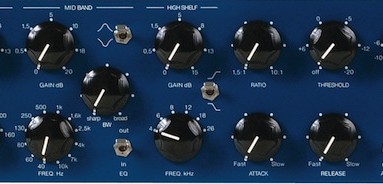 Buy at least one high quality tube pre-amp. Microphone manufacturing has been steadily improving to the point where you can spend a small amount of money and get a pretty decent sound from a mic. However, when less expensive parts are used to make microphone they the area the most tend to lack is a feeling of fullness (followed by presence). By having a good tube pre-amp and using it often, you can have one piece of gear that can be added to the signal chain of different sorts of inputs. You can use it on anything that you might record with a mic, use it as an insert when mixing, etc. Having a great mic is nice, too, but the tube outboard gear can be used in more situations, so if you hace to choice, the tube pre (try to get one with a basic EQ and compressor) is a good choice.
Know your angles when placing microphones. Off-axis and distance from the sound source are two quick and easy changes to microphone positioning that can make big differences in the recorded sound. Off-axis helps decrease sibilance, and increasing distance (on cardioid polar patterns) decreases the low-end frequency response (also meaning that the inverse is true: getting closer to the mic increases the low end). If you’re working with a singer and angle the mic off-axis (i.e. not pointed perfectly straight at them) they’ll want to sing straight into the mic, but you can always through a pop filter in front of it so they don’t notice as much that they’re not singing at a straight 90 degree angle into the mic.
Leave ample headroom when setting levels. A killer during a recording session is when you’re in the middle of a take, the musicians can feel that they’re nailing the take, so then they start playing with a little more energy and then you start clipping all your inputs because you set your levels to high. If you’re lucky enough to be recording to tape, then you’ll might get a manageable distortion and be OK, but if you’re recording digitally, you will very quickly become the least popular person in the studio. The resolution options (bit depth) are deep enough now where you should be recording at higher settings (at least 24 bit), which gives you a greater dynamic range. Many A/D converters also have soft limiters built in, which will help protect you in those sorts of situations. But above all be safe: make sure when setting your levels that you leave some room so you don’t start clipping in the middle of the best take of the musician’s lives. (Besides, some of the best sounding records every recorded were recorded at much lower levels than the super-compressed stuff you hear in broadcast and commercially distributed MP3s.)
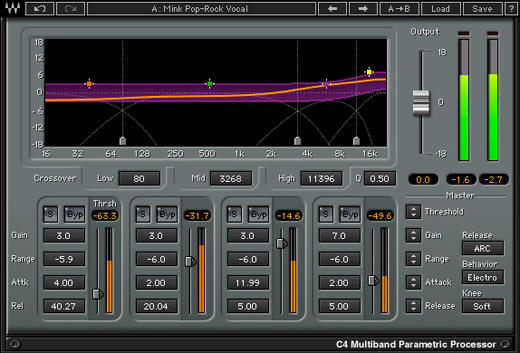 Purchase and learn how to use multi-band compressor plugins. The multi-band compressor is one of my favorite pieces of gear. As a plug-in it gives you nearly countless instances of enhanced dynamic and even frequency balance control over your tracks. By breaking down a signal into 3 or 4 frequency ranges, and being able to compress each with different ratios, thresholds, etc., you are granted a much greater ability to get control over the sound with less of the limitations of traditional broadband compressors. Of course, it would be an injustice to the audio world if I didn’t add: be careful! A lot of people strive blindly for loudness, which just results in a squashed sound that has no life or character. While multi-band compressors allow you to barely touch the frequency ranges that need to remain open in order for the signal to feel bright and vibrant, you can still do more harm than good if you go overboard.
Get to know your local Home Depot. Three reasons: packing blankets, wood, and insulation.
Packing Blankets: always have a half dozen of these on hand. They can be used for everything from covering up windows, to stuffing into kick drums and bass cabinets, to draping over microphone stands (boom stands set up so they look like a big “T”) to create make-shift gobos to help decrease some reflections.
Wood and insulation: The scrap pile at Home Depot can be every home studio’s best friend. You can build frames for wall panels and boxes traps, and half-boxes for absorbers. Examples: Take some craps, build some 4 foot tall shoe boxes (4 feet tall, 2 feet wide, 1 foot deep), stuff them with R19 insulation, glue or staple a bed sheet to cover to open side, then put two of them on the sides of a hi-hat to absorb a lot of its crashing in the room. Build those bigger and add some portals and troughs inside, and you have a bass trap you can use for a bench. The point is: it’s not very expensive to build some tools that help improve the sound of your space.
Don’t over compress!!! 99.9% of all new audio engineers over compress signals. I have no idea why that seems to be part of human nature, but time and time again it proves to be true. Over compression takes the life out of your signal; makes it sound flat and adds distortion that masks a lot of the overtones (why it sounds flat). If you don’t know if you are or not, then you probably are. Until you get very good at identifying when you can hear the compression kicking in, be very, very gentle compressing at all when recording; leave it for the mix when it’s not permanent.
 Make sure you can listen to headphone mixes, too. This ability depends on what you’re using as a console, but worst case scenario just use splitters when you have to. Headphone mixes are underrated when it comes to how to get a good performance out of the musician (especially singers). If you’re recording a band live (all at the same time instead of mostly overdubs), then you’ll be surprised at how different the headphone mixes actually need to be for each musician depending on what they play. If you can hear what they hear when setting up their headphone mixes, then you’ll start to get a feel for the process and different ways you can boost or cut different instruments to influence how they play.
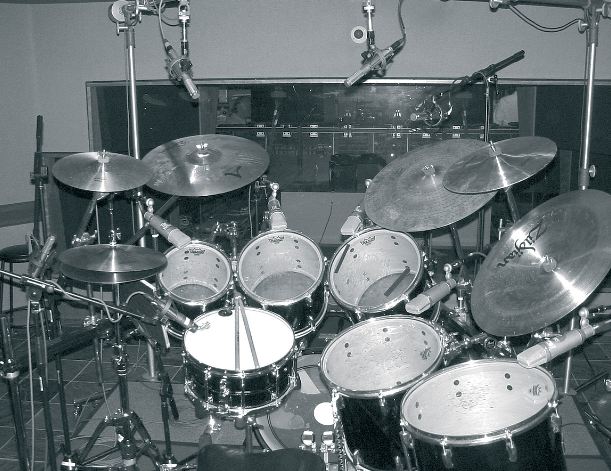
Don’t go too far with the Range setting on audio gates. Gates are nice to help clean up a mix, but they can also cause an “odd” feeling when they open because the bleed also comes through. This is particularly true with tom drums, for example. Picture all the cymbals that are very close to the tom drums. Naturally, you want to gate the toms so that you can get more control over the tone and positioning of the cymbals, hi-hat and snare… but the cymbals don’t stop when the drummer finally does hit a tom, which means all of the sudden, there’s a lot my cymbal you mix whenever a tom drum gets hit… it feels odd and unsettling. By not always using an extreme range on your gates (range is the amount of attenuation), then when the gate “closes” it doesn’t result in no sound, but more like turning it down a little… so that when the gate opens again, it’s not as explosive… like sitting in the dark and suddenly turning on all the lights… it’s more like the lights are dimmed, then turn up brighter.
When recording vocals: performance is paramount. The most important thing about a lead vocal is not necessarily the sound quality, it’s the performance of the artist. Some of the best vocal recordings in history clip, distort, and are noisy, but the performance is so good that the vocal can reach through the speakers and make the person listening sit in wonder. Sometimes, if you focus too much in the technical parts of being a recording engineer, you forget the art and magic that it’s your job to capture in a recording. You are recording art – basically capturing a moment in time. If everyone in the studio is focusing too much on the technical and not on creating the moment, then the performance will be lackluster. Sure, it will likely sound good, but it won’t be magic. Pay very close attention to your artists. Watch them. Pay attention to their attitude, if they look bored, excited, in the mood or going through the motions, etc. By paying attention at all times, you can help make small decisions here and there to help foster a creative environment that balances the technical aspects of recording that you need to get a high quality sound with the creative aspects the artists need to give the best performance they can while in the studio.
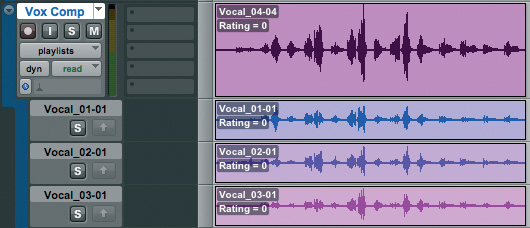
Do real stacking (doubling), never fake it with a chorus or copying and nudging audio tracks. To get a “wall of sound” for guitars or vocals you need to record stacks: the same part recording multiple times, then usually panned throughout the stereo field. No matter how technically talented a guitar player might be, they’re never going to play it exactly the same way more than once, so when you stack all those different takes, it thickens the sound. Many will try to copy and paste tracks, then nudge them a little on the timeline, EQ differently, through a chorus on it to try and create a stacked sound… and it will sort of do that… but it’s never as good as taking the time to record proper stacks (especially distorted electric guitars and background vocals).
Always remember: the more you process a signal the more distortion you add to it. Distortion isn’t just the sound you think of with clipping or distortion on guitar amps. Distortion is any difference between the input and output. When it’s digital, you’re often adding dither, resampling, etc. so every time you try to tweak a signal you might be making its tone and dynamics more what you want, but you are also, quite literally, degrading the originally recorded digital audio. This does not mean you never EQ or anything like that, but it is important to keep that in mind. First, because it helps you work harder to get the best possible recorded sound. The better the sound to tape, the less you have to work it in the mix. Second, because reminding yourself that “the more you process the more you degrade” might encourage you to back off on your EQs and compression, use them more sparingly, so that you don’t do more harm than good. Take all things, including EQ, dynamics, and FX, in moderation.
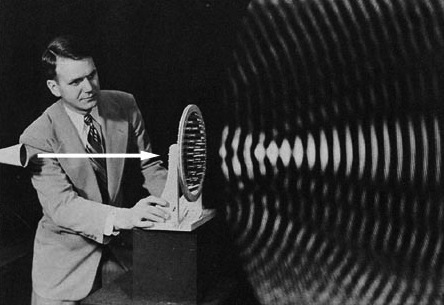 Teach yourself to visualize sound. This one is pretty meta, but it has helped me time and time again. I don’t mean picturing sound as a complex sound wave like you see it on your computer screen. I’m talking about real sound – sound as it happens in the real world. Someone strums an acoustic guitar and then there are millions of air molecules bouncing around and hitting one another. Some are faster than the others, some have more energy and some less. They’re all compressing together and expanding back out again, hitting hard sufaces and changing direction, all losing energy along the way. All those things that happen to actually create sound that we hear as human beings with our ears and brains. “Seeing” what happens in a room has always helped me decide where to place instruments and mics, as well as work with reverbs and EQing when mixing. So much of what audio engineers do is working machines and gear and computers, but all of those toys – every single one of them – is doing the same thing: capturing and shaping sound… so you better darn well understand and respect sound; not just inside a computer, but how we hear it in the real world where it sounds full and bright and has so much depth that we can close our eyes and actually see the environment. You need to love sound, not just music.
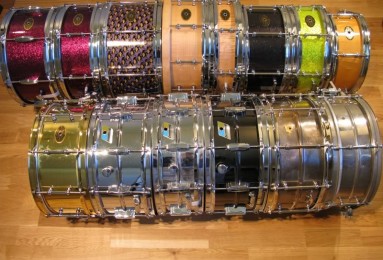 Don’t be afraid to switch out instruments. Every studio should be very good friends with the local music store, rehearsal spaces, and local studio musicians. Sometimes the instruments that artists bring in just aren’t any good. If it’s a matter of old strings on a guitar, or old heads on drums, then those are things you can quickly fix, but sometimes the instruments just sound flat, dead, and cheap. If you get stuck in that situation, don’t waste everyone’s time trying to make a bad instrument sound good: the cost to rent something good (or borrow it from a friend) is a lot less than the studio time cost to disguise a crappy sound source. The audio engineer’s black bag isn’t just a great microphones or customized outboard gear of a super-secret signal path drawn on a napkin kept in your safe… it’s also instruments that sound great when recorded. You should have a friend who will let you use the best sounding kick drum or 10 inch snare for 20 bucks a day, and another person who has the best sounding acoustic guitar you’ve ever heard recorded to tape. Having those resources is just as important as all the others – and knowing when to stop trying to make bad instrument sound good is equally as important. If the sound source sucks, there’s only so much you can do in the mix fix it, so most times its better to have a great sound from the beginning.
Experiment with the order of your signal path. When people start audio engineering they tend to visualize a particular order to their processing, sort of like a fixed signal flow that might be on their console (i.e. insert to gate to EQ to compressor). Larger format audio consoles generally allow you to move the EQ and dynamics section around in the signal flow so that you can get more control over your processing. With digital audio workstations this is always an option you should use (usually just by dragging around the order of the plugins on the inserts of the audio channel). If you’ve taken some of the advice above – particularly when it comes to visualizing what’s really happening with sound – then you will start to get a feel for what “happens” to an audio signal when you EQ it before vs. after a heavy compressor. For example, due to the impact on the low end that a strong compressor (higher ratio, sharp knee) can have on an audio signal, placing an EQ that boosts the low end before vs. after that compressor results in a different sort of sound. Give it a try. Take a track (a real recorded sound, not a sample or synth), and try it. As mentioned with other examples: start with more extreme EQ settings so you train your ears what to listen for, then back off more and more until you can hear the differences without having to boost or cut the signal by extreme amounts anymore.
Published: by | Updated: 07-03-2014 08:17:55